Sunday, March 8, 2026

Raid on Torokina Island

A Headless Body Production

Venue:  An Undisclosed Community Center near Phoenixville, Pa
Event:  Providence Gamer's Game Night
A picture of a picture and may be trademarked, maybe not...  Stolen without permission.

Players: Phil Gardocki, Steve Turn and John Forscythe running the Japanese.
               Garth Parker and Bruce Potter running Squadron 13.
Game System: Cruel Seas
Theme: Slap stick

The Forces:
The Japanese, all ordinary
2 T14 Motor Torpedo Boats
1 Ka-Go tank
4 Sampans
6 Scattered Machine Gun Nests

PT Boat Squadron 13
4 Higgins Boats (one veteran)
McHale's Pirates
 

Story Time:

December, 1943, aerial reconnaissance has discovered a build up of Japanese forces on Torokina Island.  The code breakers have determined that the intention of this build up is to launch a regiment sized invasion of Puruata island to dislodge a battalion of the 3rd Marine division that occupied it a couple of weeks ago.

Now the Marines are more than happy to trade ammo with the Japanese, but at high command, cooler heads prevailed.  Based on the concept that a battle not fought is a battle won, it was decided to launch a spoiler attack with cheaper, and more expendable forces.

Admiral Rogers assigned Captain Binghamton's PT Boat Squadron 13 to the task of launching a night time raid on Torokina.  An opportunity to get rid of those annoying pirates of PT 73.  But the problem is the PT 73 was in dry doc for much needed repairs.  

So he split up the PT-73's crew to 4 other boats to fill in for the "sick, lame or lazy."  
 
This game was designed by that expert scenario builder, Tom Sessler and had run it several times at major conventions.  The link below is a page of links with the basic rules for Cruel Seas, but about half way down are the scenario rules, counter set, personality cards and map references.  A lot of detail work here.
https://tsessler.weebly.com/cruel-seas.html 
 

Basic Layout.
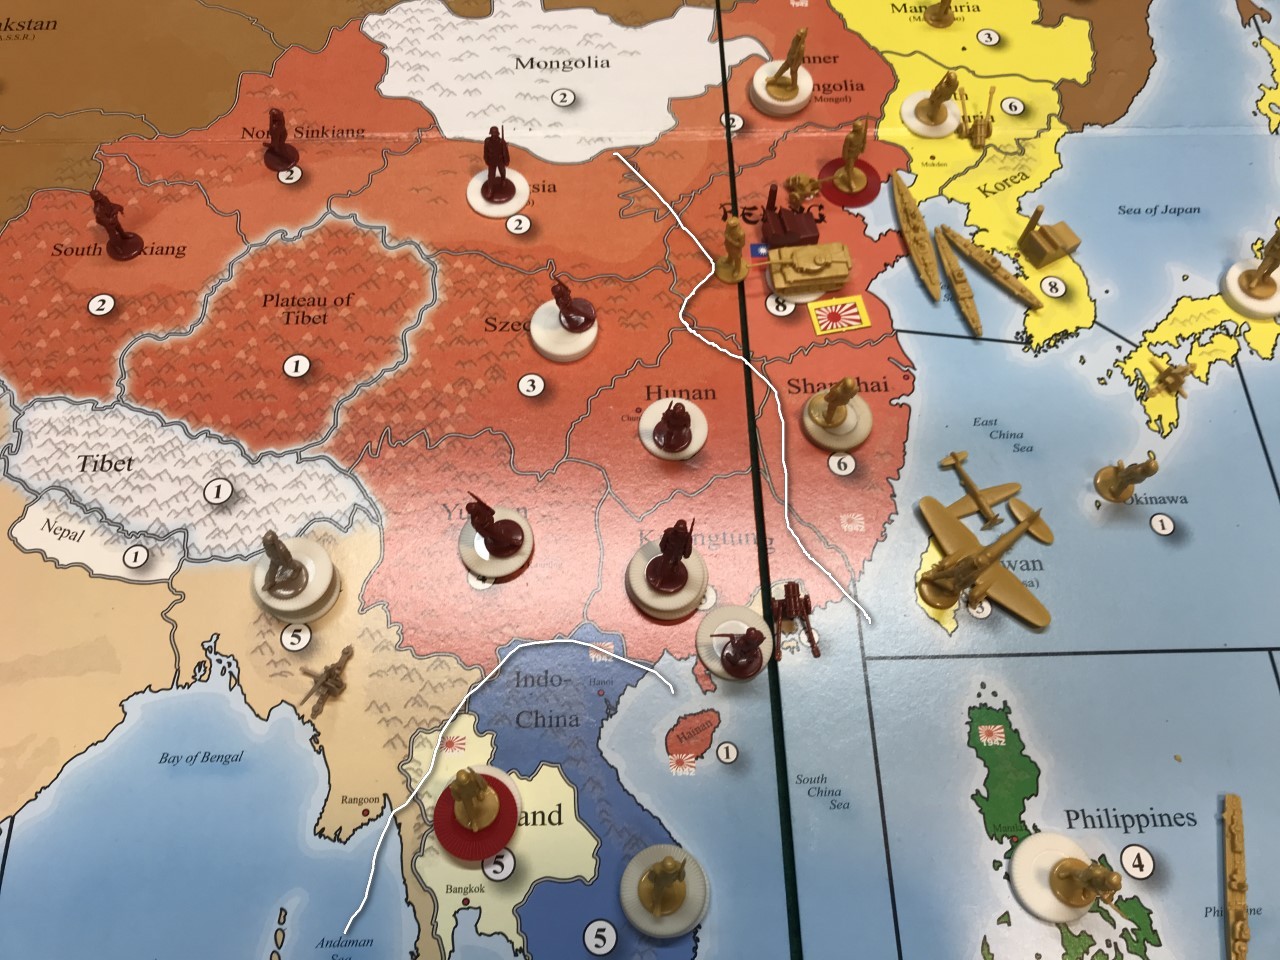
This is how the game was laid out.  Japanese are allowed to adjust their mobile forces.  The PT Boats can start from any edge they see fit.
After Turn 1:
The Americans start from 4 different areas, surrounding the Sampans to be used as transport for the Japanese Regiment in their invasion of Puruata.

More importantly, the Sampans are worth points!  Each one is worth 80 points.  The Americans need 360 points and not lose more than 2 PT boats to win.

But those points come at a price.  Each Sampan is armed with  a 20mm gun, which rolls 3D6 damage and a heavy machine gun, which rolls 2D6 damage.

On the left, one PT boat is attracting attention of the near by Japanese Type 14 patrol boat.  In the rear of the island, the PT Boat has it's 40mm gun manned by the sharp shooting Gunners Mate Edwards. His goal is to destroy the Ammo dump hidden in the trees.  Destroying it would effectively destroy the chances of the Japanese to invade Puruata.  But more importantly, points!  24.  That may not seem like much, but the explosion can damage nearby huts, each also worth 24 points.

On the right, one PT boat is disguised as a Japanese Type 14, the other is manned by Fuji Kobaiji.  Each has the effect of convincing any shooters that they are friendly, and cancels the shot.

They fooled the machine gunners, but the commander of the Ha Go tank had sharper eyes. His gunner is spot on and hits Gruber's PT boat for four dice of damage and taking out it's search light!  Each PT boat can take 45 points.


At the end of turn two has one of the Japanese Type-14's going under, the other trying to hide in cloud of smoke.

Captain Binghamton radios in for an update.  Unfortunately this PT boat  is configured a bit differently than the PT-73 and instead of answering the radio, McHale's switch turns on the outboard lights.  Their disguise blown, the Ka-Go and supporting MG nests pepper the PT.  The Ka-Go  puts another 3.7cm explosive round in it.  Taking out one of the empty torpedo racks.  

McHale has had enough this and orders the 40mm to swing around and shoot at the tracers fired from the MG's.  The Ka-Go's 9mm of side armor wasn't designed for 50 cal ammunition and quickly dimpled, before the turret was blown from the hull by a 40mm shell!

On the left, the PT took out the only perceived resistance of the charging Type-14.  

Most of the Sampans race(!) toward the available gap at 3cm a turn. 

Off camera on top.  The PT with GM-1 Edwards sidles up to the beach.  Placing the reticles of his 40mm on the haphazard collection of boxes in the trees.  He sets the firing switch to full auto.  He will have only one extended burst before reload.  But this is fish in a barrel.

Ensign Parker leans over his to peek through the crosshairs, trips, jostling Edwards as his finger locks down on the trigger.  The air lights up in flames as the the rounds go ballistic, landing in the ocean some 2 miles away.

Short form.  Bruce rolled a 3 that he needed to hit.  The Japanese played the Ensign Parker card, .  Forcing a reroll.  The card is usable only once per game.

There are 11 personality cards in this scenario.  8 enhance the 13th squadron boats.  But 3, Ensign Parker, Captain Binghamton and Lieutenant Carpenter, are bozo's and playable by the Japanese.   At the link above, scroll down and see  Personality Cards #3.

Turn 3: 

At the top of the picture, GM-1 Edwards reloads half the magazine of his 40mm and damages the ammo dump.

On the left, a PT is engaging a Sampan.

On the right, McHale laying smoke, races along a Sampan, hulling it with his 40mm. Then turns for the  outbound under the cover of smoke generated by a Type-14.  Between his MG's and Fuji's PT, sink the last Type-14.  

Turn 4: 

As smoke begins to dissipate, McHale's and Fuji's PT's come under fire from Sampans and shore based machine guns.  MaHale's engine room catches fire and he orders his crew to abandon the boat and swim for shore.  Fuji's PT trades shots with a Sampan and sinks it,.  

At the top, the ammo dump takes more hits, but stubbornly refuses to detonate.

On the left, the PT boat is taking fire from all sides but taking only minor damage. 

Turn 5: 

At the top there is a huge explosion of the ammo dump.  But fortune favored the Japanese as only one of the huts were damaged.

On the left, the PT trades hits with the Sampan.  The Sampan sinks, but the PT boat manages to find cover in it's burning wreck.  

Fuji's PT boat, (see wreck marker with the dice set to 6) also takes a rudder hit, and actually turns to port at speed and runs aground.

Turn 6:

The PT at the top, mission accomplished, revs it's engines to "combat speed"

The PT on the left lays smoke and also goes to combat speed.  Sinking a third Sampan  Bringing the score up to 354.  They need 360 to win, and not lose more than 2 PT boats doing it.

Currently that PT boat has exactly one hull point left.

Turn 7: 

Deciding the Sampan was too tough a target, the PT zooms away, Tracers  following in his rooster tail.  On the way out, he finds the Generals personal Flying Boat and destroys it for a total of 378 points and the win.

Post Script:

In this week's episode of McHale's Navy, Captain Binghamton is seen celebrating the demise of McHale and half of his crew. Unknown to him, McHale and crew survive the attack and with the help of Fuji disguised as a Japanese officer, they make it back to the base at Taratupa. (They manage to use a radio to contact one of the surviving PT boats. They circle back and pick everyone up.) An Admiral from COMPAC Fleet HQ shows up and pins medals on all of the crewmen and McHale for bravery. The episode ends with Binghamton rolling his eyes and saying 'Why me? Why does this ALWAYS happen to me???" 


Sunday, April 6, 2025

Corporal Wojek

Standing in the shadow of Scotland’s Edinburgh Castle is a statue of a man and a bear. The placard next to them reveals they are Polish soldiers and World War II heroes — yes, even the bear. Named “Wojtek,” the Syrian brown bear spent years in the Polish army before his journey ended in Edinburgh, where his statue’s nose now gleams gold from friendly pats. But that journey began thousands of miles away in Iran, in 1942.

Image stolen from Wikipedia without permission.

Wojtek arrived at the 22nd Artillery Supply Company of the Polish II Corps by happenstance, when a young Iranian shepherd traded the orphaned bear for a Swiss army knife, some chocolate, and canned beef. The Polish soldiers received a tiny cub in a burlap sack, who was placed under the care of a soldier named Peter Prendys. To everyone’s delight, the animal quickly assimilated, and in 1944 he became Private Wojtek, meaning “joyful warrior” in Polish. He was fed double rations, often washing it down with a beer.

Wojtek’s antics provided much-needed entertainment, but he was more than just a pet. The bear proved his worth on the battlefield when his company was reassigned to Italy. Eyewitness reports from May 1944, during the Battle of Monte Cassino, purport that Wojtek bravely carried artillery shells and ammo crates across the battlefield. After the battle, the company changed its insignia to a bear holding an artillery shell, and Wojtek was promoted to corporal. When the war ended, Wojtek said goodbye to his compeers and retired to the Edinburgh Zoo, where he lived from 1947 until his death in 1963, and where a statue now honors his extraordinary life of adventure and achievement.
 
 
Article stolen without editing or permission from History Facts.
See also the Wikipedia article here...

Thursday, February 23, 2023

World War II using The WarGame. This time its real

A Headless Body Production
Venue: An undisclosed basement
The Nations: The Thousand Year Reich led by Phil Gardocki  
                        Imperial Japan led by Garth Parker
                        The United Socialist Soviet Republic led by Steve Turn
                        The United States of America led by John Forscythe
                        The Commonwealth of Nations led by Bruce Potter

Game System: The War Game, World War II.

The War Game,World War II, was originally published by Jeffery Stein in 1997.

This version will be using the rules as updated in 2015.  See here for the pdf.

The previous game, played solitaire, ran 4 turns.  Now it is time to turn the table over to real players.

House Rules:

Commanders.  If the commander of a major country (not Italy, France or China) is lost, a new commander becomes available on that country's next turn.  The penalty for losing the commander is reduced recruitment of infantry in every province by 1 for the next turn. 

The German/Italian turn

Following the model of the ground game in the solitaire running of the game, the Axis forces in Europe attack Leningrad and Egypt with all the air and ground forces available.  The German submarine fleets surge into the Atlantic and take potshots at a few allied ships with mixed results.

I didn't do a very good job of taking pictures this time around.  Some were blurry, or out of sync with events.

The game starts in the Jan 42- June 42 turn.  With some historical events already Fait accompli.  Like Japan already has taken most of its Pacific rim islands, including the Philippines, but not Java.

The Germans and the Italians move first.

Germany sends von Rundstedt to Heeresgruppe Nord to organize the taking of Leningrad.  He pulls in forces from Heeresgruppe Mitte and arranges shore bombardment by the KMS Tripitz.


Leningrad proved to be an easy nut to crack.

The Italian General Garibaldi leads Italian German forces into Cairo.


The Russians decide to ignore their loses and continue to build up.  Between Lend-Lease and their production, they recruit 15 infantry units


The UK forces build up in Egyptian Sudan.  Off panel is a landing by Indian Forces in Somalia
In Europe, the air war has begun.  British bombers brave the concentrated flak guns in France and bomb for $12 of damage, taking no losses.


The Pacific before the Japanese turn.
The Japanese pull a massive and successful assault on Peking.

Elsewhere in the Pacific, the Japanese fleet engage the Americans at Hawaii, sinking a carrier group, and destroying two battleships.

Near the Celebes islands, another sea battle was fault, with the Japanese losing a Battleship and a couple of destroyers.


The remaining American Carrier flees to the Atlantic.


Where American Industrial Might has begun it's work

5 units of infantry and a fighter on the east coast


4 more fighters and a bomber on the west coast


And sending $49 in lend lease dollars to China, USSR and the UK.

End of Turn 1.


Sunday, February 19, 2023

World War II Using The War Game Turn 3

A Headless Body Production
Venue: An undisclosed basement
Players: Phil Gardocki running both Axis and Allies.
Game System: The War Game, World War II.

The War Game,World War II, was originally published by Jeffery Stein in 1997.

This version will be using the rules as updated in 2015.  See here for the pdf.

For turn 2, see here.

The German/Italian turn

A note from the previous turn. When British and American bombers caused $23 losses due to Strategic bombing. Out of around $140
On the Russian front, The Romanian army has reinforced Heeresgruppe Sud. This completes the preparation of the German attack the on Caucuses region.
With Egypt and Jordan secured, the Italians are ready to explode throughout the Middle East.
The Americans have landed in Morocco.
Its the Clash of the Titans. The Germans have 14 infantry supported by 3 Panzer Gruppes, and 4 Luftfottes.
The Mediterranean wolf pack attacks the invading fleet.

A game note. Submarines that attack get a "Preemptive shot". Removing casualties before the opposing fleet shots back.

The Italian forces attack French held Syria, and the Neutral countries of Iraq and Saudi Arabia.

A game note. To attack a Neutral Country. First the attacking country pays twice it's production value to the bank. So Italy had to pay $6 to attack Saudi Arabia. Then a die is rolled. If the dice is under the production value, then the attacking forces lose 1 unit. In this case, the Italians lost a unit in the Arabian deserts, but just drove into Iraq.

The Germans take the Caucasus's, but lost far more troops then expected.
The allies defeated the axis submarines, losing only a destroyer. And now secure sea dominance in the Atlantic and the Western Mediterranean.

The Axis heavily reinforced Algeria and Tunis with both new production and shipping.

But the Axis remains dominant in the eastern Mediterranean.
In East Africa, the Africa Korps holds in the Sudan. It could possibly attack and take either Kenya or the Congo, but would be weakened and vulnerable to a counter attack.

Russian Turn:

A counter attack like the one in Russia. Led by Zukhov, the Russians throw wave after wave of infantry at German Panzers and guns. Proving the adage, quantity is a quality all it's own.
The UK invades Italian held Somalia from India.

It is now that Malta, that small island in the center of the Mediterranean, decides to play. Malta had been ignored by both Axis and Allies on Turn 1 and 2. Too much trouble to take for the Axis. No enough effect for the Allies to use it.

But 3 freighters offloading troops and tanks in Tripoli is too tempting to ignore. Joined by a destroyer group, fighter bombers from Malta rake the transports. Sinking one on the first strike. Italian aircraft scramble. The second round, Hurricanes and Sagittario dog fight to oblivion. Capronis sink the destroyers. But the damage was done. The Italians lose 2 transports and a fighter. Game cost $35, to a destroyer and a fighter, cost $25.

On "Scrambling". Fighters from adjacent areas can be "Scrambled" to defend adjacent areas. But they do not arrive until the second round of combat.

One further note on Scrambling. Fighters can be scrambled multiple times. So in this case they could scramble to defend the freighters in the sea zone. And if the Americans attack Algeria in their turn, the Fighters can scramble to defend Algeria as well.

Italians scramble their air forces in Libya.
The UK lands Indian troops in Somalia.
Churchill double downs on his Norwegian adventure. This time sending Field Marshal Montgomery and 6 units of infantry.
British bombers continue their Strategic Bombing campaign.
Which was successful. The UK traded 2 fighters for 2 German fighters, and caused $30 (the limit they can cause) of industrial damage.
The UK and French is well set to counterattack next turn in Africa.

Japan:

The situation so far in China. Japan controls most of the high production value provinces. The Chinese are strong in Kwangtuag, but probably not strong enough.
Kwangtuag is attacked by land and sea from multiple points.  Chaing Kai Shek takes to the field, and with his guidance, kill many Japanese. 
In a surprise move, the Japanese amphibiously assault India.
The UK are isolated in Burma, surrounded by strong Japanese forces

America:  

America is faced with rapidly reinforced Axis forces in Africa. Attacking would wear the GI's down. There are not enough transports to reinforce Morocco quickly enough. 

But wait. This is only a game. There is enough transport to sea-lift 7 units straight to Italy. Forget Salerno and Anzio. Who cares if we let Morocco fall back into Axis hands.  Lets just take Rome, Naples and Genoa in one fell swoop.

I plead hubris on this one. The Italian reinforcements all went into Africa, leaving Italy ripe for the picking.

American B-17's fill the sky over France. Escorted by carrier borne F4F fighters against German 88mm flak guns.  The fighters and AA trade as losses, but then it was bombers all the way. Causing $30 in strategic bombing damage.

This means a total loss next turn to Germany of $60, out of around $140.

The USS Essex carrier group is commissioned, along with supporting destroyers and aircraft.

What makes this really significant is the 12 submarines operating around Hawaii. If the Japanese want to send their carriers to engage, they will have to risk sub attack, then the Essex will also have land based air to support it.


What makes this really significant is that in addition to building a carrier group, the US also sent $45 to China and Russia as lend lease. 

At the beginning of this game I thought the Axis was unstoppable.  They were taking high value areas with minor loses. The Germans are creaking.  They have taken Leningrad and surrounding areas at a significant cost.  But are now taking unacceptable losses from UK and US bombing.This turn $60 in lost production and $40 lost AA and fighters.  That doesn't leave a lot left for the attrition war with Russia.  

The Japanese still go where they will, And probably will take all of Asia.  And may need to attack Russia to save Germany.  But most likely, America will build another carrier group in the Pacific, and will have fleet parity there.

Then there is Italy.  Probably the mistake the Axis will not be able to recover from.


Friday, February 17, 2023

World War II Using The War Game Turn 2

A Headless Body Production
Venue: An undisclosed basement
Players: Phil Gardocki running both Axis and Allies.
Game System: The War Game, World War II.

The War Game,World War II, was originally published by Jeffery Stein in 1997.

This version will be using the rules as updated in 2015.  See here for the pdf.

For turn 1, see here.

Synopsis:

On turn 1, the Axis made bold moves. Germany briefly taking Leningrad. The Italians taking Egypt, and Japanese securing Peking.

At sea, the Japanese sank major US Naval assets. And the British destroyed one of two wolf packs.

The situation in Russia at the end of turn 1.
The situation in the stormy Atlantic at the end of turn 1.


The situation in the Middle East at the end of turn 1.
The situation in China at the end of turn 1.
The Africa Korps. supported by Italian air, advances from Egypt to the Sudan. Garibaldi, with reinforcements sea lifted in, leads the Italian army into Palestine.


The combined sub fleet of the Axis retreats into the Med.

It is a timid move. But America has a large force of destroyers that rolled off the rails on the East coast, and is prepared to stomp any U-Boat force the Axis can muster. It is better to be a "force in being" for now, with a potential counter strike later.

The Germans repeat their attack on Leningrad.

The Luftwaffe is strong in Finland, and will be reinforced with new builds. The Transport ships new infantry in, allowing the Tirpitz a supporting "Shore Bombardment" strike on round 1.

The result is a strong victory for the Germans. They secure Leningrad and two northern provinces. The only downsides were the Russians were able to "Scorched Earth" the Major Factory, turning it into a minor factory, and Timshenko escaped to Moscow. Where he was promptly executed by Stalin.

The result in the Middle East is a complete victory for the Axis. The Italians lose just 1 infantry, destroying about 7 Commonwealth Infantry.
The Japanese fleet doesn't know what to do.

There is no enemy fleet to fight. Raiding the west coast seems an option. But the Americans win an attrition war. It was thought to be better to keep the fleet intact for when the American fleet decides to come out and play again.

But in China, the Japanese army makes serious inroads.
The Japanese invasion fleet at Java goes after the remaining Commonwealth fleet in the (very) south Pacific.
America launched a lot of ships last turn. 6 Destroyers, 6 Subs. This is reinforced by the Pacific Fleet.
Operation Torch is launched. Morocco falls without a loss to the Allies.
America launches 6 more subs, and a pair of Liberty ships.

Also this turn.

Churchill gave into pressure and ordered a Norway invasion. The Royal Navy provided their Carrier and Battleships supporting. Coordination with shore bombardment was poor, and the Canadians were pinned on the beach, and wiped out.

The British also began the strategic bombing campaign on Germany. Germany will lose 13 dollars from the bombing, and a fighter, which cost 14, defending the Reich. But the British lost two fighters as escorts, costing 15 each for 30. And so a virtual tie.

The Americans braved AA fire with their own raid on France. Their bomber survived AA fire, and inflicted 8 dollars in damage to Germanys production next turn.

Strategic bombing works like this. First there is an intercept round where only fighters, bombers and artillery (AA) fight. Surviving bombers then cause 2 die 12 worth of damage to the next turns production from that province. This damage has an upper limit equal to 1/2 the production of the province, plus a bonus for it's factories. +2 for Minor Factory, +20 (!) for major factory.

So in Germany, their production is 20 and a Major Factory. The limit of Strategic bombing is 30. 1/2 of 20, + 20. In France, with a Minor Factory, it is 8. 1/2 of 13, rounded down to 6, plus 2.

So Strategic Bombing is more about finding a good target than having overwhelming bombers.