Monday, February 13, 2023

World War II Using The War Game Turn 1

A Headless Body Production
Venue: An undisclosed basement
Players: Phil Gardocki running both Axis and Allies.
Game System: The War Game, World War II.

The War Game,World War II, was originally published by Jeffery Stein in 1997.

This version will be using the rules as updated in 2015.  See here for the pdf.

While perusing the flea market at Lee Con, see my Ancients battle reports, I noticed a large box titled "The War Game, World War II". It seemed to be independently produced way back when. The game has an Axis and Allies (hereafter referred to as A&A) feel to it. There was some difficulty opening the box, as it weighed about 50 pounds. The figures were still unpunched. The previous owner had downloaded all the updates, and other documentation that I have yet to work out adding about 10 pounds to the weight of the box. But never played the game! The map board, was 3' 2" tall and 6' 6" wide. Which will barely fit my 4x8 gaming table.

Basement provided to offer scale.

This would be a great game for our gaming group. We all have played A&A which is on a significantly smaller board, and Europe tends to be very crowded with overflowing figures. The War Game,World War II, offers an impressive view while waiting your turn. With images of the mandatory scene in every WWII movie with military personnel viewing their battle boards, moving the elements with croupier sticks.

The game plays a lot like A&A. But with more nuances. Pretty much the economic system is 2 times the cash, 2 times the cost. But the units have a +/- a dollar or two depending on the nation. China, Russia and Germany pay less for infantry, the US pays less for high production cost items, like ships and aircraft.

Another nuance is the during the battle phase. An attacker can pause a battle, and then start another one, see the results, then continue the original. At first I thought that was a gamey and needless complication. But I thought about the German attack on Kursk. Part of the decision tree to call of that offensive had to do with the Allied invasion of Sicily. I'll still think about it.

But at least one of us will need to be a "subject matter expert". So I read through the rules, then punched out the figures, shaving down the significant flash, set up the game, then read the 2015 rules. And two days later, I was ready to play this game solitaire.

It took about 4 hours to play the first turn. Too be fair, I was re-reading all the rules as needed, and running all 7 countries.

Deployment:

I was cutting out the units, and deploying, and so had time to think about what shape the first turn would take. The first nation punched was Japan.

White chips represent additional forces. So a unit with an infantry figure and 2 chips represents 3 units.

Red chips represent 5 units.

The Japanese setup looks weak in Asia. The Chinese in Peking have 8 infantry, + one Commonwealth, and no, I don't know what that is about, a fighter and an artillery. The most the Japanese has in any area is 3 infantry in Asia.

Throughout the Pacific, the Japanese has littered the board with destroyers, transports, submarines, and single infantry units. In the Marshal islands is a concentration representing the Kido Butai, 2 carrier units representing the 6 Japanese fleet carriers, with 4 fighters on deck, a battleship, and a few destroyers and subs. In Pearl are two US battleships, one damaged, an aircraft carrier, a couple of fighters and land units.

So here is the plan. The Japanese are clearly deployed to make a second raid on Pearl Harbor. They will get hurt, but if they take out all but one major naval combatant of the US in the Pacific, they will buy themselves time to conquer China. I mentioned that the Japanese army seems weak in China, but there are transports all over the place, and they can actually focus a significant force on Peking. Taking that will significantly reduce Chinese production, add to their own. The production system will allow the Japanese to produce many infantry, about 10, on the mainland for the followup attacks.

I love games about the Pacific. But for now we have to leave those emerald waters, and head over for the main event, Europe. Frankly, the game is truly won or lost in Europe.

More space than A&A, but still crowded in Germany and the UK.

Each turn represents 6 months of the war, and the first turn is Jan-June, 1942. Looking at the board, the Germans are clearly set up to attack the Caucuses. The Russians cannot stop them, but they also have 12 infantry plus supporting units in Moscow. They can easily recapture the Caucuses, destroying the main German forces in Russia. In other words, "It's a trap!"

In Africa, Rommel's Africa Korps seems to be mostly Italian, and have parity with the Commonwealth forces in Egypt.

Arrayed against the UK, the Germans have 6 submarines, a battleship against a pair of battleships and a carrier. UK Destroyers are scattered around the Atlantic as well, supported by significant air assets in England.

In North America, the US has some pretty good assets, and the Canadians have significant factories.

About production. infantry can be built anywhere. The number of units is equal to the production value listed. Except conquered provinces, which it is halved, round down, and an upper limit of 4.

In Quebec, the production value is 5, so in theory, you can build 5 infantry units in Quebec. But they cost 6 dollars each, so money would be the limiting factor.

There are two levels of factories. The minor one, like in Quebec, allows the nation to build 2 additional units, not infantry, of any type, except carriers, battleships or bombers. This is in addition to the 5 infantry that Quebec is allowed. Ontario, and throughout the US are Major factories. They can be used to produce units of any type, except infantry, with numbers up to the production level of the province. So Ontario, cash willing, could produce 6 transports, or 3 fighters and 3 tanks, etc...

Production, Blah, Blah, Blah, get on with the game...
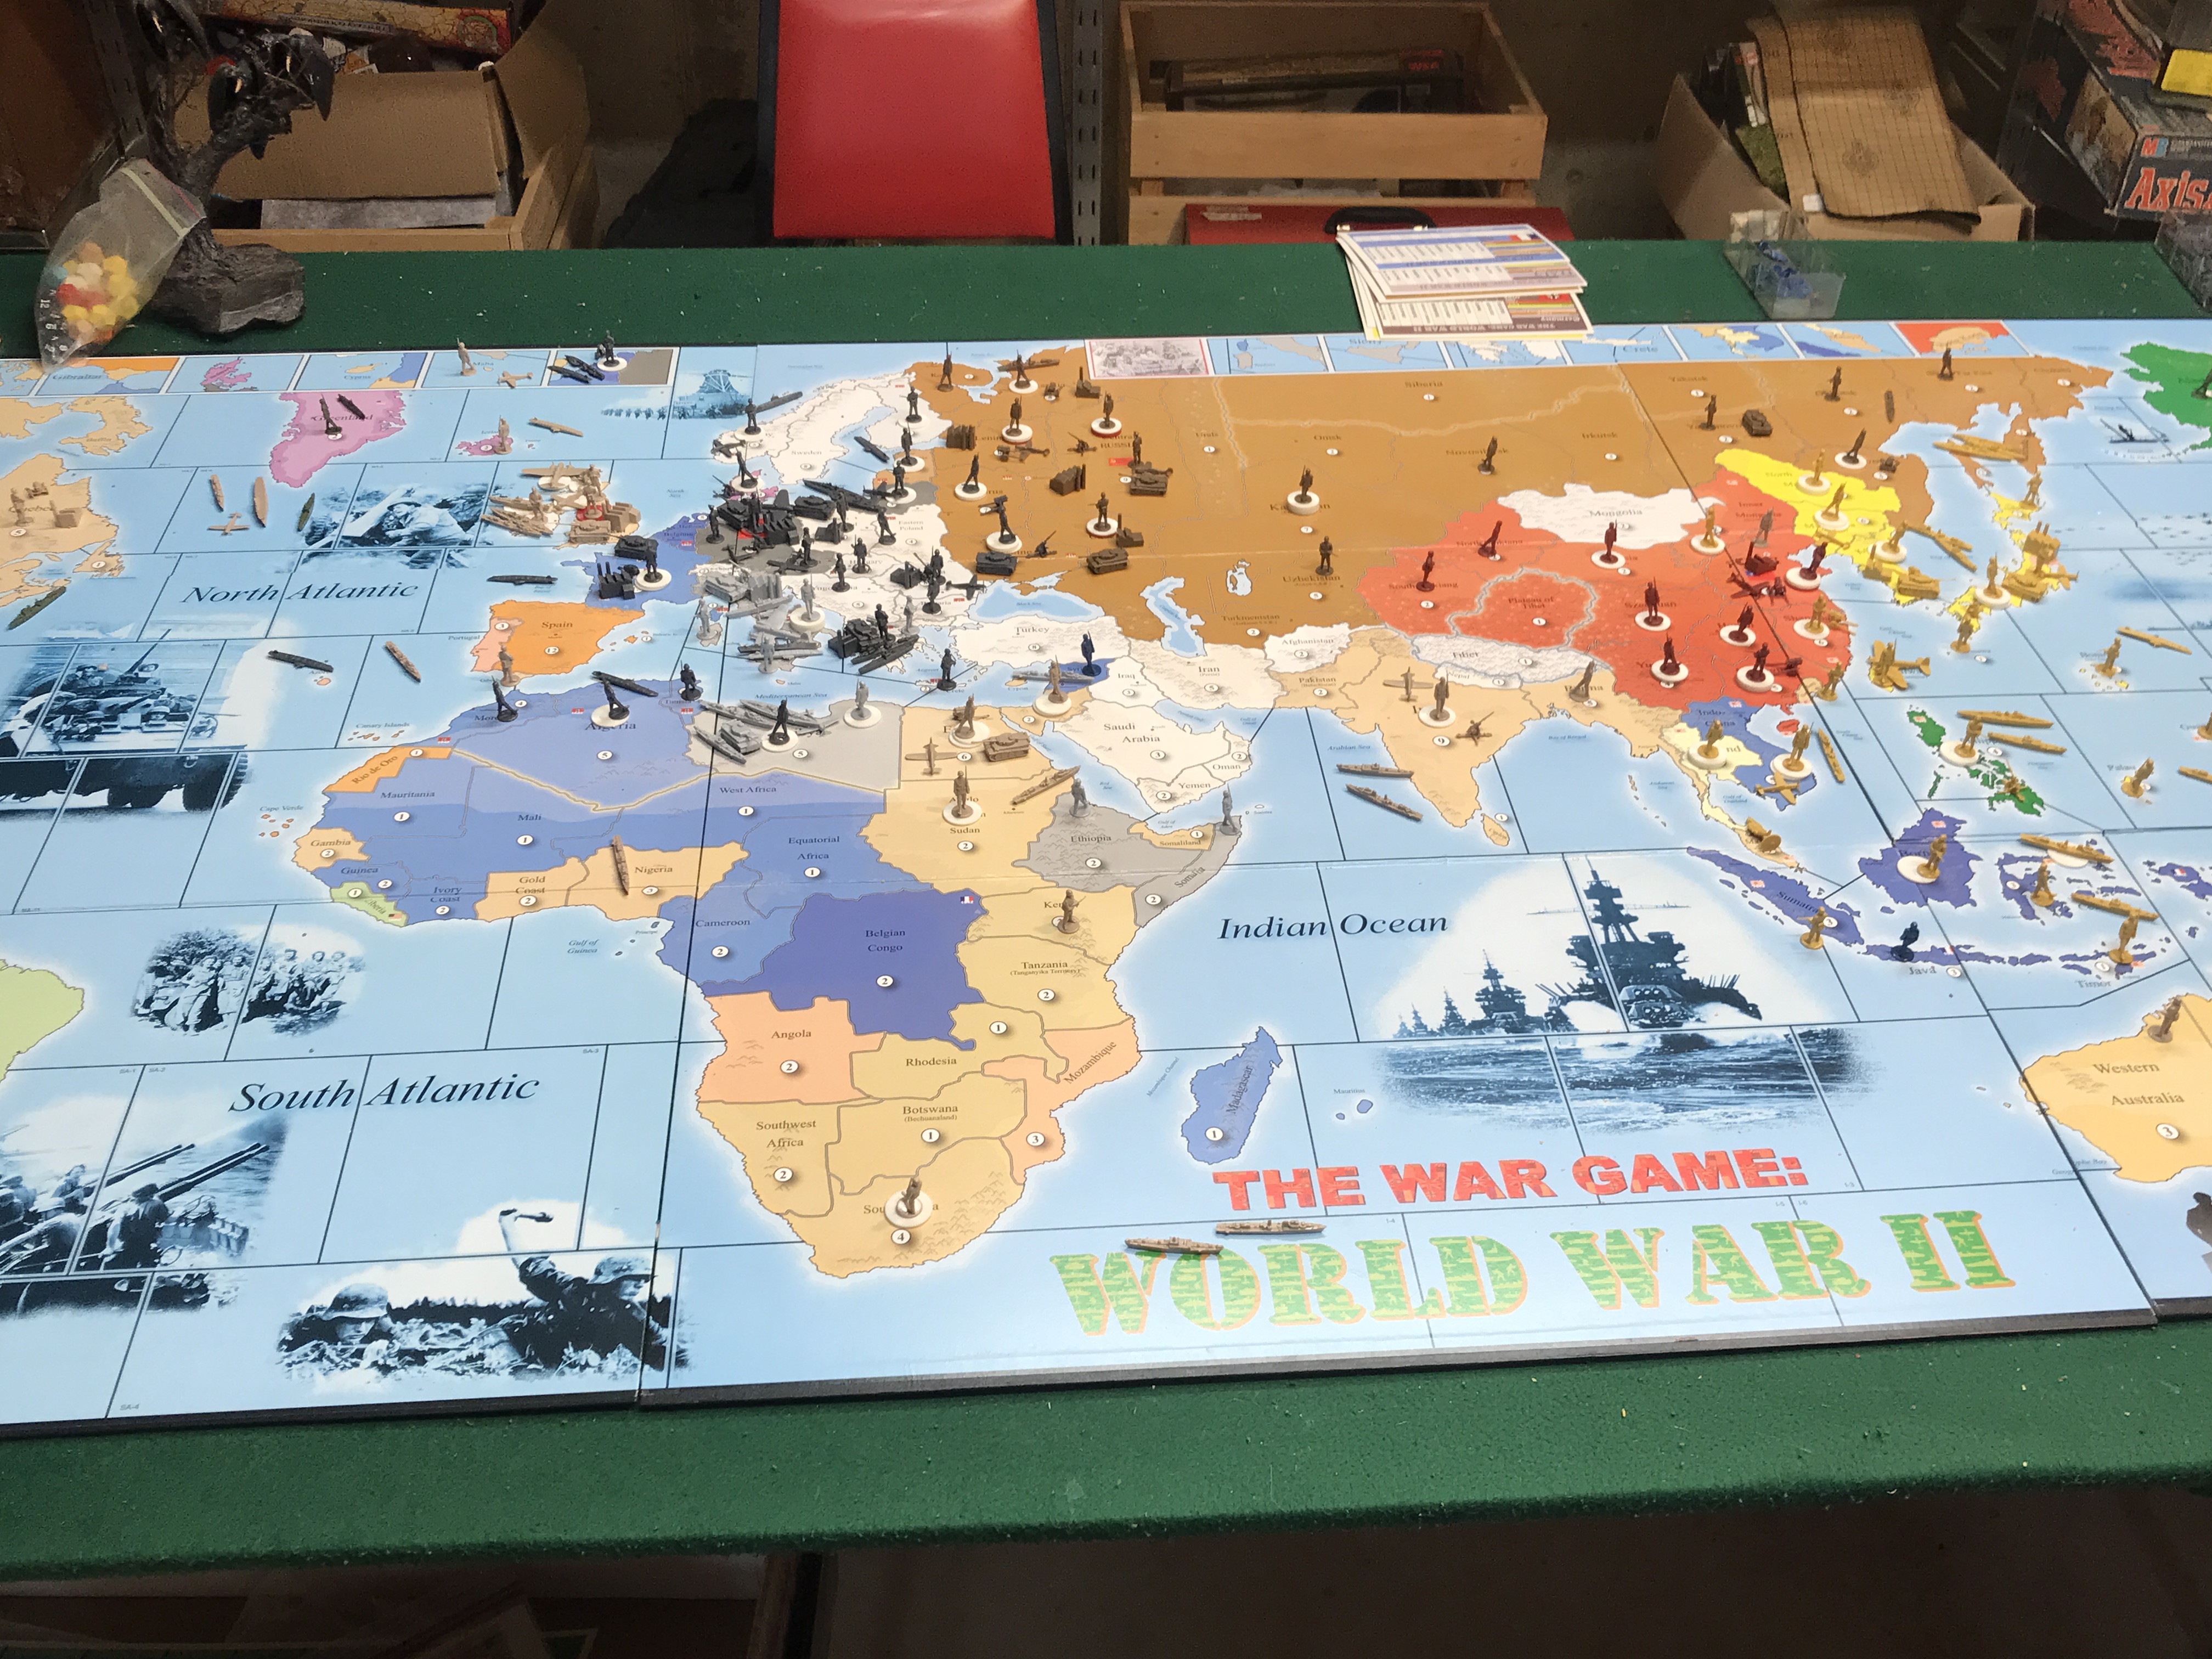
The full map deployed. I uploaded this as a full size image, and so you should be able to blow it up for more detail.

The turn sequence has a fixed order. The Germans and Italians move together as one, and move first.

The Germans decide that while it is a trap, they have no choice but to surge forward, but instead of into the Caucuses, they would focus their firepower on Leningrad. Leningrad has a factory, and is worth slightly more than the Caucuses. The ability to attack Leningrad at all is based on units from Finland, air from everywhere, amphibious assault from Germany and Prussia, which allows their battleship and destroyer to provide shore bombardment on round 1. Even though the Germans expect to be kicked out by the Russians, they still have a sizable force in the Ukraine to punch on the next turn. As long as Germany can avoid significant losses in the west, they can win an attrition war against Russia.

Like A&A, combat is taken to the Battle Board.

This is the initial force setup for the Leningrad operation. There are 8 Soviet infantry units for a total of 10 units. The Germans have brought in 7 Infantry, 4 Aircraft and an artillery.

Then you add in von Manstein, on the far right, and shift over the land units by 1 to the higher count..

In addition, there is a combined arms rule. For every tank unit in the battle, the ATTACKERS can shift 2 infantry one to the left.

Combat is resolved with 12 sided dice. Match or equal your number on the battle board scores a hit, or removal of one enemy unit.

For Amphibious operations, the Battleship and the Destroyer, get a before battle shot of 8 and 5. Damage from these shots count first, and destroyed units do not get a replying shot.

The Bomber is also a very powerful unit, and rolls twice, looking for 8's

The Leningrad operation went bloodier than expected. The Germans are left with a tank, an artillery, 2 infantry and their general, von Manstein. Every country gets 1 and only 1 General. Who adds +1 to all land units fighting. But if his forces are destroyed, he is captured and gone for the game.

Adding him made the German assault too successful. They literally destroyed the entire Leningrad garrison in 1 combat round. Which means two things:

1) They capture the factory intact. Yeah!

2) The General has to stay in the territory he just captured. Ut Oh! The plan was for him to retreat on round 2 and be safe somewhere else.

Picture taken after the battle.

In the Mediterranean, the British seem to have vacated their fleet. So the Italians and Germans are able to do an Amphibious assault on Egypt without worry of an interception. Linking up with their ground forces attacking from Libya.

In the Med, the Italians, lead by Giuseppe Garibaldi, and supported by a couple of panzer divisions sea lifted in, bounce on Egypt.
The Commonwealth forces are clearly overmatched.
And the dice were not friendly to the UK. The Axis forces lost only one infantry in the exchange.

An overwhelming victory for the Italians.

At sea, the Axis powers assemble a pair of wolf packs of submarines. Sinking a British destroyer near Gibraltar, and an UK sub in the North Sea.

After the Axis and USSR turns, there is a stand off between German and Soviet forces in the south of Russia.

Another nuance in this game is railroad movement. A unit can move an unlimited distance by rail. The capacity of the rail lines is the provinces industrial capacity. 1/2, round down for captured provinces. So the units that started in Germany, 3 tank and 6 infantry, can be moved to the front. Subject to limits like Poland which can only allow 2 through as it was captured. And Belarus, above with 7, down to 3.

So we have competed the German, Italian and Russian turns.

Onto the UK/French turn.

Yes, France is still in the game, and has pretty good production for a conquered country with all of it's colonies. I think that with lend lease, they were able to recruit 3 infantry units.

England is well defended with infantry and air units. And so can focus on the German UBoat problem.

The Royal Navy, with the help of air assets based in England, has attacked has sunk 3 UBoats operating in the Iceland sea zone. Then followed up with builds of infantry all around the empire. And a factory in India.

On to the Pacific.
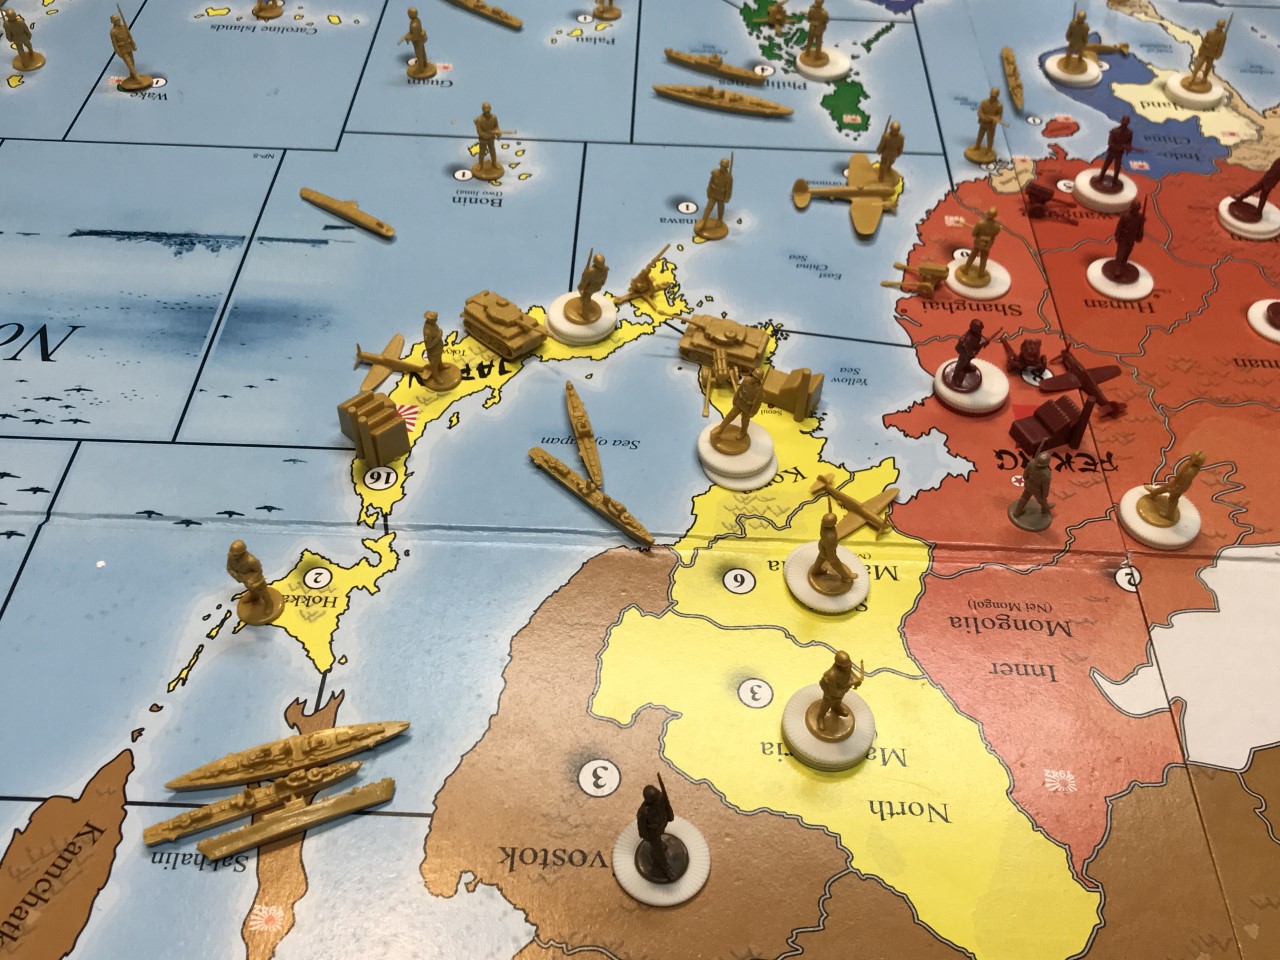
This is the start of the Japanese turn. Their army scattered around the Pacific rim, but a pair of useful transports available to focus their army.

Transports move 3, can pick up anywhere on their path, but must stop at their drop off points. Each transport can carry 2 infantry or 1 tank or 1 artillery.

Fighters can travel 4 sea zones or provinces. Bombers can travel 6. Neither can land in a newly conquered province, and there are no Kamakazi's allowed.


General Yasuji Okamura assembled an impressive army. Pulling troops from Korea, Manchuria, Mongolia, Shanghai and reinforced by 4 infantry by sea, supported by air and tank assets.
On the battle board. The Japanese have 7 against 9 Chinese infantry. But overall, 15-11 in units. Also, General Okamura's effects have not yet been applied to the board. Moving all the Japanese infantry to 3, tanks to 9. Then combined arms effects, putting 4 Japanese infantry on the 4 chart.
After the first round of combat, Chinese AA and Fighters shoot down 2 Japanese fighters. But they Japanese army lose only 2 infantry otherwise.

The Chinese were then obliterated on the second round of combat, causing no further damage. Worse for the Chinese, the Japanese selected 10 infantry as to recruit, and was able to put 3 in Shanghai, with returning aircraft, and 1 in Mongolia. Giving them a 2-1 advantage in numbers in China, and better than that in quality of forces.

Nagumo launches another raid on Pearl Harbor
There are no Admirals in this game, so the forces involved are unadjusted.

Battleships and Subs get a "preemptive" shot on the first round. Meaning they shoot, and hits removed from the battle without shooting back. Submarines also have this ability as attackers.

In the preemptive round, The Japanese get 3 rolls. One for their battleship on the 8 chart, 2 for their subs on the 4 chart. The Americans get two rolls on the 8 chart with their battleship.

The Americans lose two destroyers and an aircraft. The Japanese lose only a submarine.

At the end of the round, the Americans scored zero further hits, losing everything but their battleships and carrier.

 This leaves only the Enterprise carrier group in the south east Pacific.

Going into round 2.


With a series of abysmal rolls by the Americans. Nagumo's Kido Butai is unscathed.

Going into these battles, the defense has an option to retreat. Which means the attacker will get unanswered shots, but the surviving defenders get away. I did not elect to do this on the hope of causing more damage. For the Russians, Brits and Chinese, this would not have made a wit of difference, as they pretty much were wiped out on the first round. But if the Americans had, they would have saved a carrier and 2 battleships.

The Americans and the Chinese move last in the game.

America adopts a "German First" policy, and focuses it's remaining naval assets into the Atlantic. Their only carrier to unite with 12 newly constructed warships, 6 subs, 6 destroyers, and their last battleship.

You could say they just abandoned the Pacific, but that is for the historians to decide, sometime in the future.

In summary.  

The war in Russia is going back and forth.  With both sides heavily reinforcing their forces for another round.

In Africa, the Italian-Germans have secured the Suez Canal, and are strong enough to attack either into the middle east, or points south, possibly both.

In the Atlantic, the Germans have sunk a destroyer and a submarine, losing 3 UBoats.  The Americans fleet has some 9 destroyers, a carrier and a battleship against the remaining 4 Italian-German UBoats, and are preparing to invade Morocco. 

India and Burma have been reinforced with troops and a factory.  But Japan also has reinforced Indo China.

The Chinese suffered a very significant defeat, but managed to take back Hong Kong in their turn. 

The Japanese fleet is dominant in the Pacific.  It's only problem is finding targets worthy of the effort of their fleet.

Overall, the Axis Bum rushes have worked pretty well.  All but in Russia were successful.  Though that had a strong luck component as well.  But the allied production is very strong.  Roughly 400 to the Axis's 225 to start.

Turn 2 is now up.  See Here


Wednesday, April 15, 2020

WWII Divisional Artillery Doctrine


WWII Divisional Artillery Doctrine
Phil Gardocki

In my days as a game designer, I was faced, like others before me, the dilemma of how do you evaluate the strength of a unit.  I think about my early Avalon Hill games where many infantry divisions and corps were 4-4-4 (attack, defense, movement), and armored units 5-5-4 up to 8-8-6.  But where do these numbers come from?  Having known a couple Avalon Hill game designers, I realized they were just broad-ass-guesses, and just trying to produce games that gave the results they expected. 
For example, the Avalon Hill game D-Day.  A favorite of mine.  All the allied infantry divisions were 4-4-4, while all the armor was 5-5-4.  German infantry ranged from 1-2-2 to 3-4-3, while panzers ranged from 5-5-4 to 7-7-4.  How do they figure?  An American infantry division had 9 battalions of infantry, 4 battalions of artillery and about 5 other supporting battalions.  Their German counterpart had 6 battalions of infantry, 3 battalions of artillery and about 5 other supporting battalions.  So 50% more infantry, and 33% more artillery gets them 1 measly point of attack advantage.

But truth is, if an American infantry division has a meeting engagement with its German counterpart, it will shred the German.  Put the Germans in defensive positions, and the result will take longer, but the Germans are going to lose.  But Avalon Hill would rate that exchange as even odds.

Another game like this was France 40.  French Infantry Corps are 6-6’s, the Germans 7-6’s.  But in this game, the combat table results are not just a straight up result.  There was a result that forced a counterattack, in which the French then had to roll on the 1-2 chart, which risked destruction.  The end result was if the Germans attack the French, the French corps had a small chance of being destroyed, but the reverse was not true.  So if you take the Panzers out of the game, the Germans will still win.  So here a small advantage in the numbers skewed big results in a derivative combat matrix.

So what determines the power of a division?  A major factor is the artillery.  Referred as the King of the battlefield.  In WWI, artillery caused 60% of all combat casualties.  Despite all the problems with operating  artillery, the resources in creating the gun, manning, supplying, moving, communication. These were considered a necessary evil in order to throw down range shells that can kill everything with 30 meters.

During the interim war years, a considerable amount of thought was spent trying to make these killing machines even better.

The French:
The French were not in the war for very long.  And a lot of that had to do with being suckered in the first 10 days by the panzers piercing the Ardennes.  But there is a lot more to it than that.  Since the French won the last war, they were allowed to keep their equipment, and didn’t feel the need to spend as much updating it.  Which meant that their primary artillery piece was the fast firing 75mm gun.  It served them well in WWI, and as a direct fire weapon, it was hard to beat.  The French were not blind to the advances in artillery, and their division artillery park was expanded to include a battalion of 12, 105mm guns.  They didn’t fire as fast as the 75’s, but the blasting charge was 2kg, compared with .7kg of the 75’s.

There were two problems with this.  The doctrine was direct fire.  So while the 100mm gun could shoot 10 kilometers, there was no field where that kind of visibility existed, and doctrine supporting indirect fire for the main infantry divisions was still in the preliminary stages.

The French were beginning to develop indirect fire procedures, and started upgrading divisions to a heavier mix of artillery tubes to 36 105’s and 12 150’s.  But time ran out before this could be implemented army wide.

The Germans:
The Germans were not saddled with old equipment, and so had some luxury to think what would be better before implementation. They started with addressing the problems with artillery. Their first thought was to scale up the guns. The artillery park for a German Infantry division in 1940 was thirty-six 105mm howitzers, and twelve 150mm howitzers in four battalions. Each battalion had observer teams that would be assigned to the elements on the attack. Basically each infantry regiment would have an observer team at all times and be able to count on twelve barrels supporting its advance at all times. The howitzers had ranges of 12 and 13 kilometers. And with that range, the guns could support a comfortable advance before the guns themselves would have to move.

sFH 18
The pride of this artillery park was the German 150mm gun. Its blast radius was about double that of the 100mm gun, and it broke down into two parts so that it could be transported by standard horse teams. All other nationalities had to rely upon motorized transport to move their heavy guns of similar caliber.

In addition to the divisional artillery, each regiment was equipped with six leIG 75mm guns and two sIG 150mm guns. These guns had short barrels, L11, and so were considerably lighter then their divisional counterparts, 6 tonnes vs 2 tonnes in the case of the 150's, and were designed for direct line fire.

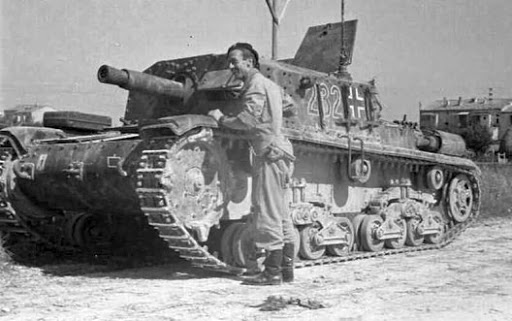
Sturmgeschutz C/D.  Image stolen from Wikipedia without permission.
A new concept, conceived by General von Manstein, was the Sturmgeschutz, or Storm Gun, a turretless tank designed for direct support of the infantry. These vehicles were operated by the Artillery department and totally separate from the Panzer department. They sported a short, L24 barrel designed for direct fire. Initially they deployed in batteries of 6 vehicles. This later grew to battalions of 21, then 30. But in practice in the early war, single batteries would be temporarily assigned to divisions for specific assaults.

In the end, the divisional “Throw-Weight” of artillery of the Germans was double that of the French, and their communications was more sophisticated which allowed for directed artillery on the spur of the moment.

The famous Panzer divisions did not have the huge advantage in artillery that the infantry divisions had. The evolution of this unit was still undergoing major changes as both experience, and equipment, was gained. In Poland, they started with just two artillery battalions, each with twelve 105mm towed howitzers. This supporting 3 combat regiments, 2 Panzer and 1 Infantry. For the Russian war, the design was changed to 1 Panzer and 2 Infantry regiments per division. This has been maligned with the thought that it diluted the strength of the Panzers from 300 per division to 180. But at the same time, an artillery battalion was added, changing the Panzer to tube ratio from 12:1 to 5:1, greatly increasing the support for each Panzer in combat.

In the later periods of the war, German infantry divisions were reduced in size from 9 infantry and 4 artillery battalions to 6 and 3, reducing the strength, but maintaining the ratio.

The British:
The British also was saddled with a large WWI inventory, but never felt the need to maintain the large standing army, and it was cheaper to upgrade the smaller army.  So old inventory was sold off and scrapped, and the BEF was a fairly modern army.  

Their answer to artillery fire direction did not look at advancement in radio communications, or rely on planned placement of the guns, or trained observers.  They changed the Process, and created one that was flexible, frugal, and unique.

British 25 pound (88mm) guns
Their thought was this, whatever we need to shoot artillery at, someone must have an eyeball on it.  Every company has a mortar team, and they are within a couple hundred yards of the enemy that needed shelling.  Every so many shells would be a colored smoke shell.  When the regimental guns, usually 25 pounders, saw that smoke, it would then add its guns to the fire.  They too would add a smoke shell into the mix.  The divisional artillery, with their 4.5 or 5.5 inch guns would then begin to pummel the spot.

There was one standard radio signal for this whole process.  “Cease Fire!”  And at that, everyone stops, and the front lines begin to assess what to do next.

Simple, and exceptionally effective on defense.

Later, the British developed their own version of "Time On Target", the concept was that when a target was being serviced, that the timing of the beginning of the barrage was timed to strike at the same instant.   In theory, most of the casualties occurred then, as no one has time to react and get under cover.  Timing was run off of the BBC time announcements.

The Russians:
The Russians started the war with their infantry divisions almost a direct copy of the Germans. This should not be surprising, as the Russians allowed Germany to test technologies forbidden by the treaty of Versailles in exchange for technical advisors. But Russia did not have any of the supporting infrastructure needed to make it work. 30,000 officers were purged from the Red Army late in the 1930's. So command structure was filled with untrained incompetents. Support services were understaffed in both equipment and personnel. So a division may have a battalion of 152mm howitzers, but it would not have the tractors required to move it, or the ammunition available to fire it, and certainly no one that could direct the fire beyond what the eyeball could see.

Like the French, the Soviets had adopted a doctrine of direct fire. Partially because that is the only thing they could do, and partially due to a study by the Soviet artillery expert, whose name escapes me at the moment, that stated that destroying a target with direct fire used 10 times less ammunition then indirect fire. To be fair, though, the Soviet steppes has a much longer eyeball range than western Europe.

But due to doctrine, most Soviet howitzers only had a range of 7km or so, well out ranged by the their German counterparts.

One of the first major steps taken by the Soviets in the summer of 1941, was to simplify everything. To that end, an entire caliber of gun was excised from the system. Why have 3 major calibers, 76, 122 and 152, when 76 and 122 is good enough. So all the remaining 152's were put in a depot, not to be used again until 1944. So the Infantry division’s artillery park were reorganized in late July to just eight 76's and four 122's, with a combined throw weight of about the same as a single German 100mm battalion.

The advantage shows, as about 90% of the Soviet casualties were by German Artillery, as opposed to the west where it was around 70%.

The Italians:

As I studied the Italian army, my conclusion was this.  There was a conspiracy to create an army that no sane man would go to war with.  Unfortunately...
Note the height, just 1.8meters. 

Every other nation was scaling up the size of their artillery from the nearly universal 75mm caliber (76.2mm, 77mm, 83mm) to 100's and 150's.  Italy?  It's too heavy, lets go with 65mm.  OK, we'll throw in a few 90mm in lieu of the 100's.

Every other nation looked at the lessons from the Spanish Civil War and decided the tanks were too light and needed more armor.  The Italians...


The Americans:

The Americans were late starting the war, and started from almost a cleaner slate than anyone.  By 1939, it was under 200,000 men, and a budget so low, that artillery men had logs on wheels masquerading as field guns.  They would do the calculations, and shout, "Boom!"  They got very good at doing the calculations, and had plenty of time of dreaming what could be.

What they came up with was called "Time on Target".  The concept was to fire every gun in range of the target available.  Give it a short, brutal barrage, then adjust the guns for the next target to be serviced. This was not limited by a specific organization.  When an army artillery battalion formed up, it would link into the local radio net, and be part of the overall fire plan.  So when a Regimental commander asked for fire support for a specific hill he would typically get 48 guns from his divisional artillery regiment, 2 guns from his regimental artillery section, 4 more guns from the adjacent regiments, a battalion of army artillery that happened to be parked near by.  The hill would be hit with 42 105's and 24 155's. They would work it over for a few minutes, then move onto the next target.

This got even better in November, 1944, when adjacent divisions could cross thread and now up to 144 guns of various calibers could join in.

The Germans regarded this as "unfair."  Probably because the Americans could do this, and they could not. 


Friday, June 2, 2017

The Road to Berlin

A Headless Body Production


Flames of War After Action Report: Soviet Tank Battalion vs Panzer Kampfgruppe (trained)
Location: Regency at Providence Community Center, Phoenixville, Pa
Game: Flames of War, v3.0, Late War 2000 points

Mission: Hold the Line
 

Players: Phil Gardocki, Garth Parker, Jenny Parker, Panzer Kampfgruppe (trained) from Desperate Measures, defending
              Bruce Potter, Steve Turn, Soviet Tank Battalion, attacking

The Forces: Company Commander in a Jagdpanther, with 2 Jagdpanthers, 4 StuG IV's, 4 Hetzers, 7 Panzerfaust MG teams, 4 Panzerwerfer 42's + extra crew, 3 Sd Kfz 234/1 (2cm), 3 Sd Kfz 234/4 (PaK40), in 6 platoons, with Hans Rudel in a Ju 87G Stuka for air support.  All Confident Trained except for the infantry, which are Fearless.

The Soviets had 20 T-34 85', 4 BA 64', 4 45mm guns, 15 Infantry stands with SMG's, and HMG's, in 5 companies, with priority Sturmovik support. All Fearless Trained.


ScenarioThe Soviet juggernaut continues to pummel the German forces.  The 11th Tank Corps, 2nd Guards Army, 1st Belorussian Front, is forced to divert around the swampy area of Peitzer Ponds to the village of Teichland.  

A Kampfgruppe is organized from the 9th Army's, LVI Panzer Corps's, Panzer Division Müncheberg and Leibstandarte Schutzstaffel Adolf Hitler to hold the line at all costs while reinforcements are hastily assembled. 

The Board: The village of Teichland, south of the Peitzer Ponds of Bärenbrück and Laßzinswiesen.

The quiet village of Teichland.  Rustic setting, verdant farmlands, scenic river and lakes.  We'll see what we can do about that.
20 T-34 85's of the 11th Tank Corps stream into town.  Supported by a Reconnaissance Company, Anti-Tank Guns and Infantry.
You wouldn't know it, but the BA-64's in the picture are made of paper.
The only defenders visible are from Grenadiers from the 1st SS Panzer Division.  Armed with Machine-Guns and Panzerfausts, they are dug in and ready to repel all comers.  

The SS have been deployed in depth along the Mauster Street.
The German Company Commander, the engine of his Jagdpanther quietly idling along the woods edge, offers a stark contrast to the quiescence around him.
The Soviet Armored Cars make their Reconnaissance move to 16" from the SS.
The response of the 1st SS is, nothing.
Turn 1:
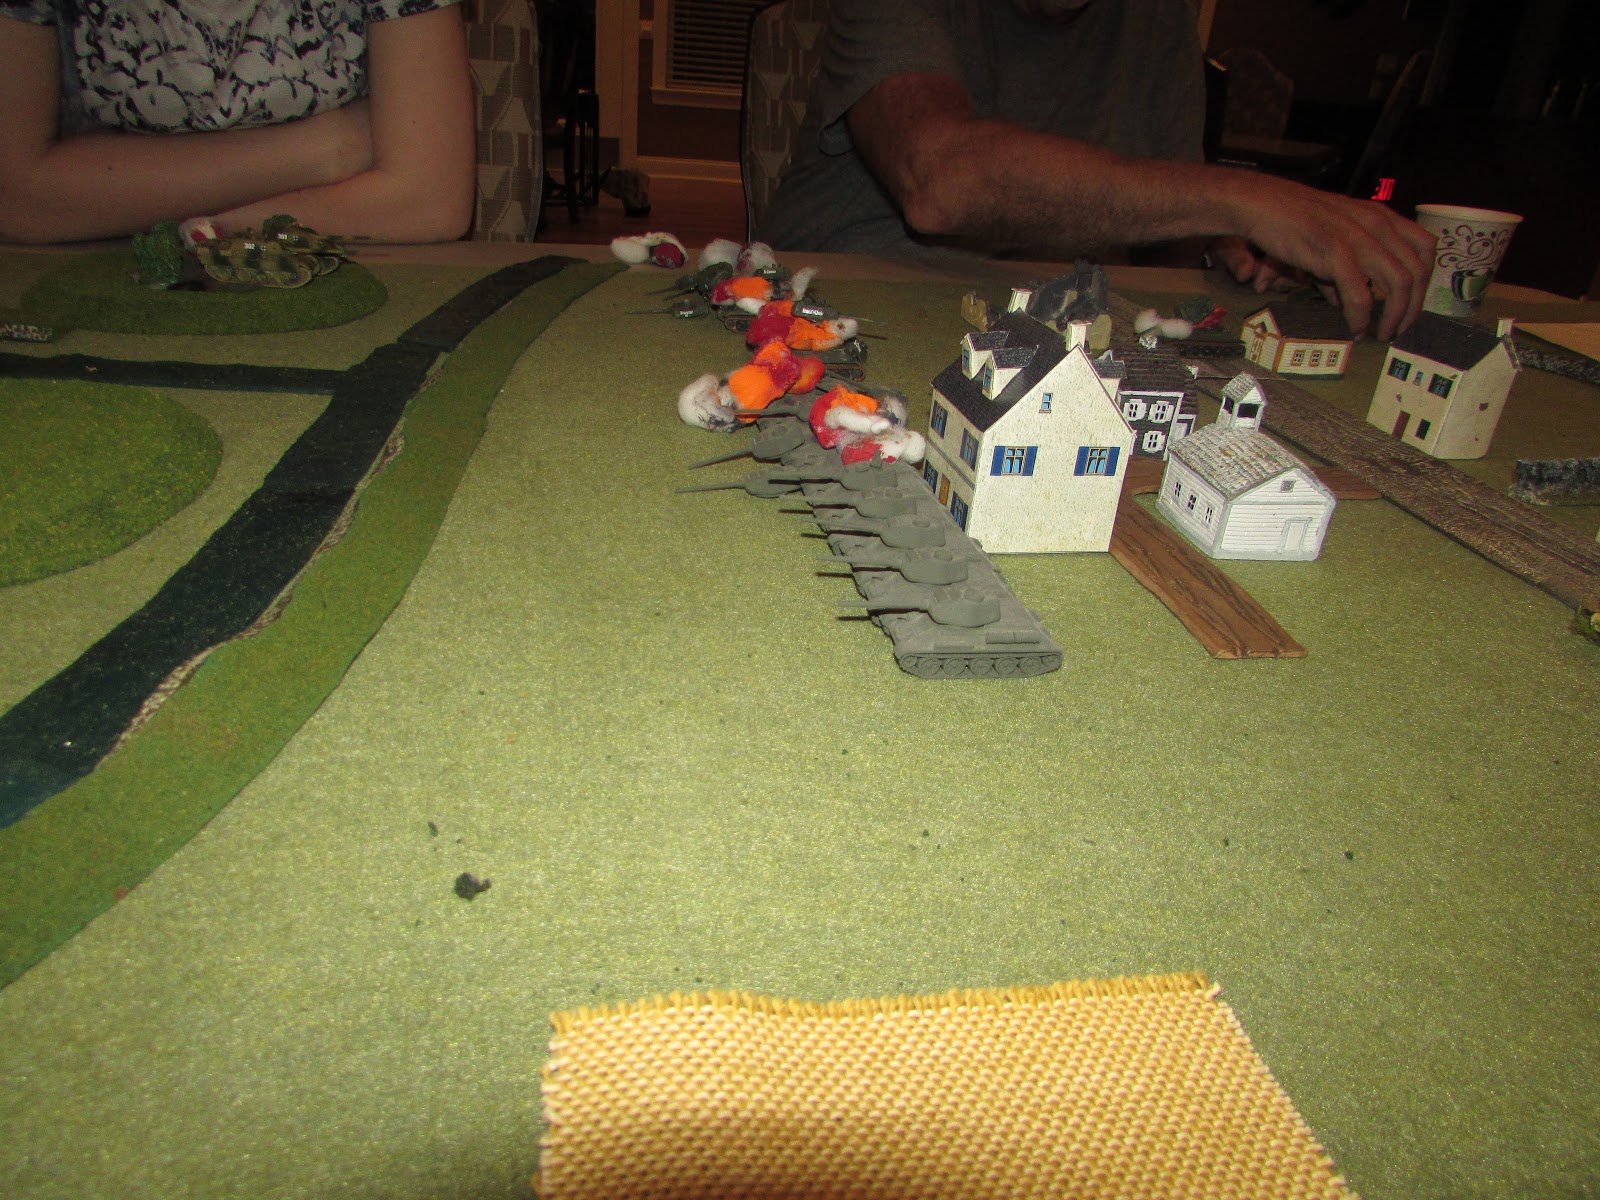
In what can only be described as perfect parade ground maneuvering, the T34's invest the town, lining up dead on their marks.


The Reconnaissance unit opens up on the dug in SS with their machine-guns, killing a team.  Well screened by their Armored Cars, the Soviet Infantry breaks out of cover and begins the long charge. 
An ambush is revealed, 2 Jagdpanthers along the wood line open up at long range, destroying 1, and bailing 1.  Hans Rudl, after dodging a flock of Soviet fighters dives to fire his 30mm cannon. But luck was not with him, as the closest tank crew panicked and fled their vehicle, but otherwise caused no damage.
Turn 2:
It is now time for the Red Army Air Force Sturmoviks to lay down rocket fire.  Successfully ranging in even though the trees.  The saving throws needed for the Jagdpanthers is 5 for a bail, 6 to bounce.
Both bounce.
The armored cars continue to pour on the MG fire into the 1st SS's positions, destroying another team, and pinning the platoon.
One T-34 is still bailed, 18 advance to short range and fire.  The frontal armor of the Jagdpanthers prove to be proof against the Soviet 85mm guns.
Another ambush is revealed, four Hetzers along the wood line.
German tank gunnery proves to be excellent, 6 more T-34's burn.
Turn 3:
The Hetzers pull back into the woods, and so are not visible to the T-34's.  Who concentrate on the German Company Commander instead, destroying his Jagdpanther.  Sturmoviks return, and are successful again at ranging in the woods.  4 Hetzers are under the template, but the rockets only find one.
The armored cars attempt an assault, but are stopped by MG fire.
Hans Rudl, again braving and avoiding fighters from the Red Army Air Force dives upon the Soviet formations, 30mm guns blazing.  The Soviet armor resists the shells, and their crews are unimpressed, continue to fire at the wood-line.
German tank gunnery has a bad turn, only killing one more T-34.

The 1st SS are emboldened having beat back the armored cars, and call up their half-tracks.
 Between the dug in infantry and their vehicles, the SS generate 19 dice.  6 Soviet infantry teams are killed in the first fusillade. 
Turn 4:
Soviet Gunnery is finally on target.  A Jagdpanther and a Hetzer are killed, others are bailed.  A successful morale check keeps their platoons on the board.
In their exuberance, to bring the half-tracks forward, the line of Soviet AT guns deployed in downtown Teichland went unnoticed.  The Soviet 45mm Gunners however, could not fail to notice the half-tracks and made them pay for their lack of situational awareness.
With the Soviet Infantry pinned, the SS turned some of their guns onto the Soviet Reconnaissance patrol, causing a morale check, which the Soviets failed.  The first unit to rout.
German reserves arrive, 4 STG's.  Even though moving and at and shooting at long range, they managed to bail two T-34's
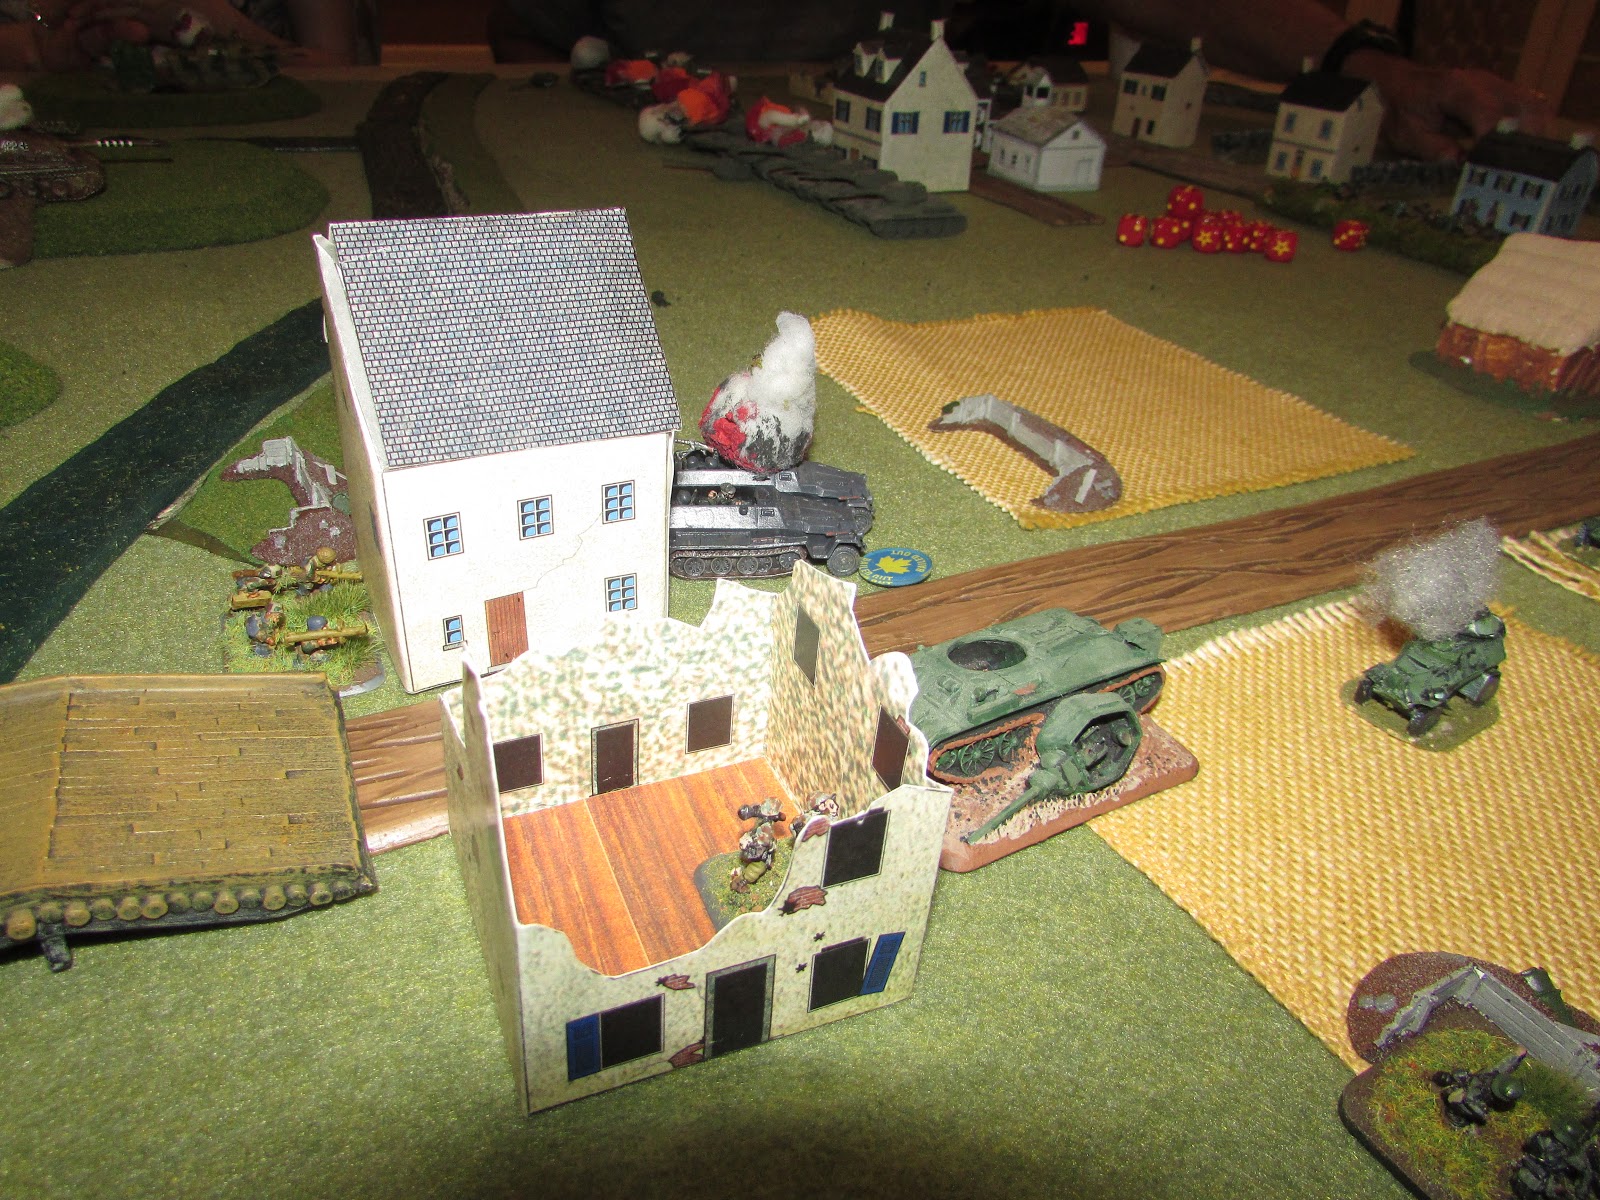
I couldn't have put that hedge piece in a better spot for those gunners.
Turn 5:
The Hetzers have been wiped out.  The Newly arriving STG's are playing hide and seek on a nearby hill.
The remaining Hetzer, snuggled between the smoking wrecks of it's peers, is now occupied by the German Company Commander.  In the upper left are the STG's I have been talking about.
The Soviet attack on the German right has totally stalled out.
The SS are pinned and down to 4 of 7 infantry teams.
Even with all the bailed tanks remounted, both Soviet Tank Companies are just barely hanging on.
The last Jagdpanther gains two kills, forcing a morale check on a Soviet Tank Company.  The last two tanks have had enough, and they run for it.
German reserves arrive.  3 Heavy Panzerspah troops, and 4 Panzerwerfers.   

Moving as jeeps down the road at a speed of 24 inches, the Panzerspah platoon hopes to add its weight of fire to the beleaguered SS. 
German AA arrives in time to have the Red Army Air Force reduced to 1 dice.  The last Sturmoviks depart waggling their wings after destroying a STG.

But for the pinging of cooling metal, the machine-guns are silent as the last of the Soviet troops take to their heels and run for their trucks.  That makes the 3rd company break of 5.  Somewhere in the last turn, the Soviet Battalion Commander was killed, and with that, the Soviet Tank Battalion is routed.  The Germans hold the line and get to live another day.  Enjoy the war!


It has been a long time since I played Flames of War.  My last blog entry is two years old!  Even though I hadn't played, I made a considerable investment in the figures, picking up all kinds of Late War Germans, SS troopers, Panthers, Tigers,  decently painted aircraft.  So when Steve put this out for this weeks game, I was all for it.  Except not version 4.  So far, I have heard nothing about v4 that interests me.  And I have been listening to WWPD podcasts talk about it all year.  And for the record, WWPD podcasts is what got me into Flames of War to begin with.

So what went wrong?

For the Soviets, I think they took so many casualties on turn 2, that they were having a hard time to make up for it.  Even though they were only facing half the German company.  The Soviet Tank commander didn't want another turn of Hen's and Chicks trying to get the flank of the Jagdpanthers.

The Soviet Recon wasn't doing recon.  Instead it was being used as light tank support for the Infantry.  But that almost worked!  When the BA 64's assaulted, they were repulsed only by the barest minimum.  If they had caused 2 casualties, the SS would have been knocked off of the objective and making morale checks.  So that was a worthy shot.

Had the Recon instead used Eyes and Ears, lifting gone to ground, the 45mm guns would have started hitting on 4's, potentially doing more damage than the MG's of the Armored Cars.  Leaving the cars still be in place.  Then they could have evaded when they took the hits that lead to their routing.

On the German side, everything was a mess.  I brought Hetzers and STG's, because they were new toys, and I wanted to play with them.  But against T-34 85's they were out classed.  The Jagdpanthers killed most of the T-34's, I think the 8 Hetzers and STG's only caused bails.  On the other hand, because they were so bunched up, the kept drawing the attention of the Red Army Air Force, which leaving the Jagdpanthers mostly alone.

The Panzerspah was a total waste, and not just because they came on too late.  Ditto the Panzerwerfers.  The main opponent was the T-34's, for which the Panzerspah's and Panzerwerfers were inadequate.

Lastly the air support.  I forgot how bad air support is in FOW.  You can blame the dice if you want.  But to spend that many points on figure, that may, or may not show up every turn, then is subject to the vagaries of the dice, I would have been far better served without the aircraft, and gotten another Jagdpanther.  Or a good AA unit to counter enemy air, and when that threat is reduced, move it off to support the Infantry with high ROF guns.  85 points well spent.

Even the Soviets had trouble, with air support.  Despite the woods, their aircraft arrived every turn, ranged in every turn, often got four under the template, and only destroyed 1 Hetzer and 1 STG.  Too much unreliability for a potentially powerful unit.