A Headless Body Production
Location: Phil's Basement
Players: Phil Gardocki, Canadian Armored Squadron (attacker)
Steve Turn, SS Kampfgruppe
Game: Flames of War, Late War, 1780 points
The Forces:
Canadian Armored Squadron (Confident, trained), "Monty's Pythons", 22nd Armored Regiment "Canadian Grenadier Guards", 4th Canadian Armored Division, 2nd Canadian Corps (attacker).
2 Troops of 3 Shermans and a Firefly (Troops 'A' and 'B')
Reconnaissance Troop of 3 Stuarts, (the Minstrels)
Motor Platoon of 4 MG teams.
Reconnaissance Armored Car Troop of 3 Armoured Cars,
Anti-tank Troop of 4 M10's,
Battery of 4 Sextons
Air Observation Post.
German, SS Kampfgruppe (mostly Fearless, Veteran)
2 Platoons of Panzergrenadiers (one Fearless Veteran , one Confident Veteran),
Each with 6 Rifle MG teams, and 1 SMG Panzerfaust team.
SS Infantry Heavy Weapons Platoon with 2 15cm sIG33 guns.
Ersatz Panzer Platoon (Confident Trained) with 1 Panzer IV, 2 Panzer III's
SS Anti-Tank Platoon with 3 PaK 40's
Hummel Schwere Panzer Platoon (Confident Trained) with 4 Tigers
SS Rocket Launcher Battery with 3 Nebelwerfers
Mission: Fighting Withdrawal. 3 objectives are placed. Both defenders and attackers start in prepared positions. Starting on turn 3 defender starts withdrawing platoons. Starting on turn 6, defender starts pulling objectives. Defender wins if attacker fails to capture an objective by turn 8.
The Board:
 |
| South side of the board. The village of Bourguebus adjacent to Hill 61. |
4 by 6 feet. An asymmetrical setup. The narrow edges are North and South, the long edges East and West.
The village of Bourguebus, is on the north edge. While the village itself is unimportant, holding it will put the allies in position to do a flank attack on the Bourguebus ridge, decoupling its defenders from the Verrières Ridge defences, which will then make the Falaise valley accessible. Hill 61 is in the north, and is the critical objective, from there heavy artillery can pummel the German SS units holding the Bourguebus Ridge.
The village of Bourguebus, is on the north edge. While the village itself is unimportant, holding it will put the allies in position to do a flank attack on the Bourguebus ridge, decoupling its defenders from the Verrières Ridge defences, which will then make the Falaise valley accessible. Hill 61 is in the north, and is the critical objective, from there heavy artillery can pummel the German SS units holding the Bourguebus Ridge.
Situation:
This scenario was set up to support WWPD's Operation Overlord Campaign and represents the Commonwealth assaults in lower Normandy region.
July 25th, "Operation Atlantic", the Canadians were deployed south of Caen, their objective is the high ground on near the village of Bourguebus. From there the defenses of Verrières can be unzipped.
In response, SS Oberstgruppenfuhrer Dietrich assembled a kampfgruppe from parts of 12th SS Panzer Division Hitlerjugend, Panzer Lehr, and recently arrived replacements destined for the 503rd Schwere Abteilung.
 |
| South side of the board from the west edge. The Shermans of Troop 'B' and the Motor Infantry Platoon invest the village of Bourguebus. Defending Hill 61, is a Panzergrenadier Platoon, reinforced by PaK 40's. |
 |
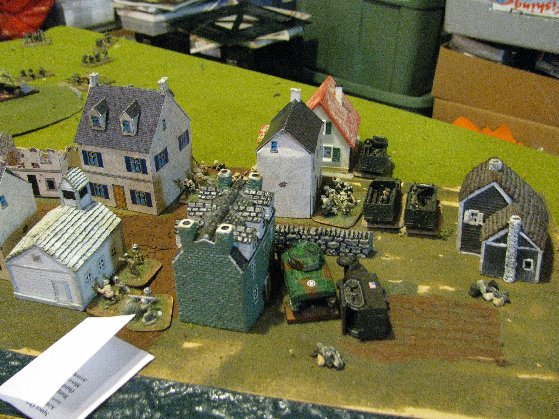
| North side of the board from the west edge. Visible are the battery of Sextons, the Shermans of Troop 'B' and the Command Platoon. Off in the distance too the north, is a troop of reconnaissance Stuarts, and on the right, hiding in both bocage and ruined farm house is a troop of reconnaissance armoured cars. In the German Center, is a Platoon of Panzergrenadiers. On the left in hull down position, is the Ersatz Panzer Platoon, backed by a short battery of sIG 150's. The Tigers cannot be seen. |
 |
| The Germans are well deployed to defend Hill 61. |
Recon Move:
Between the Recon Move, and turn 1, the two reconnaissance units cut of all the best spots for an ambush. This is particularly important as that ambush is a platoon of 4 Tigers. The Lieutenant Idle's Minstrels raced up the left flank, while Dennis Moore's armoured car troop took the road up the center line.
Turn 1:
I decide to race for the northern objective. Only 3 tanks for defenders, plenty of bocage between the objective and anyone that would challenge it it seemed easy. The Stuarts raced ahead and shot up the sIG 150's, killing one, while the Shermans killed a Panzer III. The Armoured Cars were in a position to keep one of the Panzergrenadiers honest, as would Troop 'B' and the Motor Infantry in the village would keep the other one busy.
But, due to sloppy placement, and lost perspective, there was a spot that was not covered all the recon teams zooming about. A spot big enough to drive a tank through it, more specifically 3 Tiger tanks, right next to the northern objective.
The Tigers caused their usual havoc, killing 4 Shermans. The Ersatz Panzer destroyed 2 Stuarts. Both Troops passed their motivation though, leaving their remnants on the board.
 |
| Most of the center is dominated by to platoons of Shermans. The armored cars spear point up the center. The M-10's stay in a noncommittal position to engage the Tigers when they are revealed. |
 |
| North edge of the board, the Stuarts engage the sIG 150's, killing one. |
 |
| One jeep is offered to the Panzergrenadiers, with two armoured cars covering it. |
 |
| The Shermans also score an early kill. |
 |
| In the village, the peaceful village the half tracks sleep tonight. |
 |
| Measuring carefully, 8 inches from a reconnaissance team and out of sight. 16 inches from everything else and... |
 |
| There is about a 6 inch hole that the recon teams are not covering. Just big enough for 3 Tigers to pop out of ambush! |
 |
| 5 shots from the 88's, 4 kills. 2 shots on the Armoured Cars and they fall back to regroup. |
 |
| Same wreckage, different angle. |
Turn 2:
 |
| 3 shots 2 kills from the Panzer III. |
Well, turn 1 was certainly eventful. 6 tanks traded for 1. In Bourguebus, the Motor Platoon dismounted and started approaching the objective under cover of the buildings and the watchful eyes of Troop 'B'. The Shermans of Troop 'B' had lined up on a PaK 40, and gave it a couple of volleys, but to no effect.
Lieutenant Idle, in his Stuart 'Sir Robin', skirted the Ersatz Panzer Platoon, and maneuvered to the flank of the surviving sIG 150. The subsequent assault, counter assault, reassault, and counter-reassault ended with the sIG 150 left standing, and 'Sir Robin', to beat a very brave retreat.
Now that the Tigers were out, the M-10's double timed to the cover of the nearby hill, the idea was to approach the Tigers under cover of a hull down position on the hills. While two surviving Fireflies took their shots using "Semi Indirect Fire", hoping for a lucky hit.
The Germans couldn't allow a 'Sir Robin' roaming their rear, and repositioned their Ersatz Tank Platoon and a Tiger to kill him in a number of nasty ways. And miraculously, he survived, bailed, passed motivation, and remounted in turn 3!
In the south, the PaK 40 took a couple of shots and killed a Sherman, and the other PaK killed a section of the Motor Platoon. All were pinned by a barrage from the Nebelwerfers.
 |
| The Motor Platoon dismounts and heads towards Hill 61. |
 |
| Troop 'B' takes a few shots at the PaK 40. |
 |
| Sir Robin sneaking away and buggering up. |
 |
| In a classic case of "seal the deal", Sir Robin is having his head smashed in and his heart cut out, his liver removed, his bowels unplugged, his nostrils raped and his bottom burned off ... |
 |
| And what do we do with Shermans? Burn them! But, why do Shermans burn? Because they are made of wood! |
Turn 3:
No pictures here. 'Sir Robin' tried again to kill the remaining sIG 150, and failed, and was subsequently had his eyes gouged out, his elbows broken, his kneecaps split and his body burned away.
The M10's continued to motor around the ridge in the north to try to take on the Tigers one at a time from a hull down position. The Tigers, also took advantage of their hill for a hull down position. The Fireflys continued to fire, bailing a Tiger, but getting destroyed in the process.
In Bourguebus, the Motor Platoon takes up positions in the buildings, while the Shermans of Troop 'B' evacuate to assist against the Tigers.
Since this is "Fighting Withdrawal", the Germans pulled out the Nebelwerfers.
Turn 4:
The M-10's assume their positions, contesting the objective, killing 2 Tigers and bailing a third. Only the German 2iC kept the objective in play. The followup direct fire smoke was not as lucky, as all the smoke rounds missed.
Still withdrawing, the Germans pull out the sIG 150 battery. The Ersatz Platoon rolled around the hill, claiming an M-10. The Tiger in the bocage claimed a Firefly.
 |
| Top of Turn 4. Sir Robin, and a Panzer III, are burning. Three Tigers are hull down, one Tiger is in the bocage. At the top of the picture is the sIG 150 battery and the Ersatz Panzer Platoon. Between the Tigers is the German 2iC. This was about to become very important. |
 |
| The Nebelwerfers are not seen above as they have been withdrawn. |
 |
| The M10's are in position. The command Shermans are availble to smoke the surviving Tigers. |
 |
| Two Tigers burn, one is bailed! |
 |
| A Panzer III claims an M-10. But the Tigers only get a bail. |
 |
| The last of the Fireflys takes an 88. |
Turn 5:
The M-10's finish their work, killing a third Tiger. The fourth Tiger failed motivation and fled the board. The German 2iC was killed, I don't recall how.
The German withdrawl continued with the Ersatz Panzer Platoon.
The M-10's finish their work, killing a third Tiger. The fourth Tiger failed motivation and fled the board. The German 2iC was killed, I don't recall how.
The German withdrawl continued with the Ersatz Panzer Platoon.
 |
| No Tiger replacements for the 503rd Schwere Abteilung. |
Turn 6:
The Canadians launched a general charge capturing the northern objective, but it would be for naught. The Germans were allowed to remove that objective and stay viable.
The Canadians launched a general charge capturing the northern objective, but it would be for naught. The Germans were allowed to remove that objective and stay viable.
 |
| Through the fire and the smoke charge the M-10's. |
Turn 7:
While the position is good, the timing is bad. If I don't capture the middle objective by turn 8, the defender wins. I could get to the objective, but that is all. This is a defender has a 5-2 win.
While the position is good, the timing is bad. If I don't capture the middle objective by turn 8, the defender wins. I could get to the objective, but that is all. This is a defender has a 5-2 win.
 |
| Charge continues around the flank of the bocage and the Panzergrenadiers. But it is too late. |
 |
| Troop 'B' motors up the bocage lined road, supported by Dennis Moore's armoured cars. |
Lessons Learned:
Remember the primary missions, especially early on. I lost this game on turn 1. I had it, but I instead yielded to temptation to get a cheap kill. I concentrated my Stuarts to shoot up the sIG's. Instead I should have spread them out to prevent the Tigers from appearing on that side of the board. In the end they accomplished neither the destruction of the artillery, or scouting out the ambush. With the Tiger ambush out of place, I could have easily overwhelmed the Ersatz Panzer Platoon and secured the objective .
An entertaining read.
ReplyDeleteThey say you learn more from the games you lose, hopefully that is the case here for you.
For me I am reading it from the German perspective, trying to find how I can use varying forces/platoons better... thanks for the report.
There is a saying, "there are a thousand lessons in defeat, but not one in victory." And another, "They won't take you seriously if you keep quoting cartoons."
ReplyDelete